
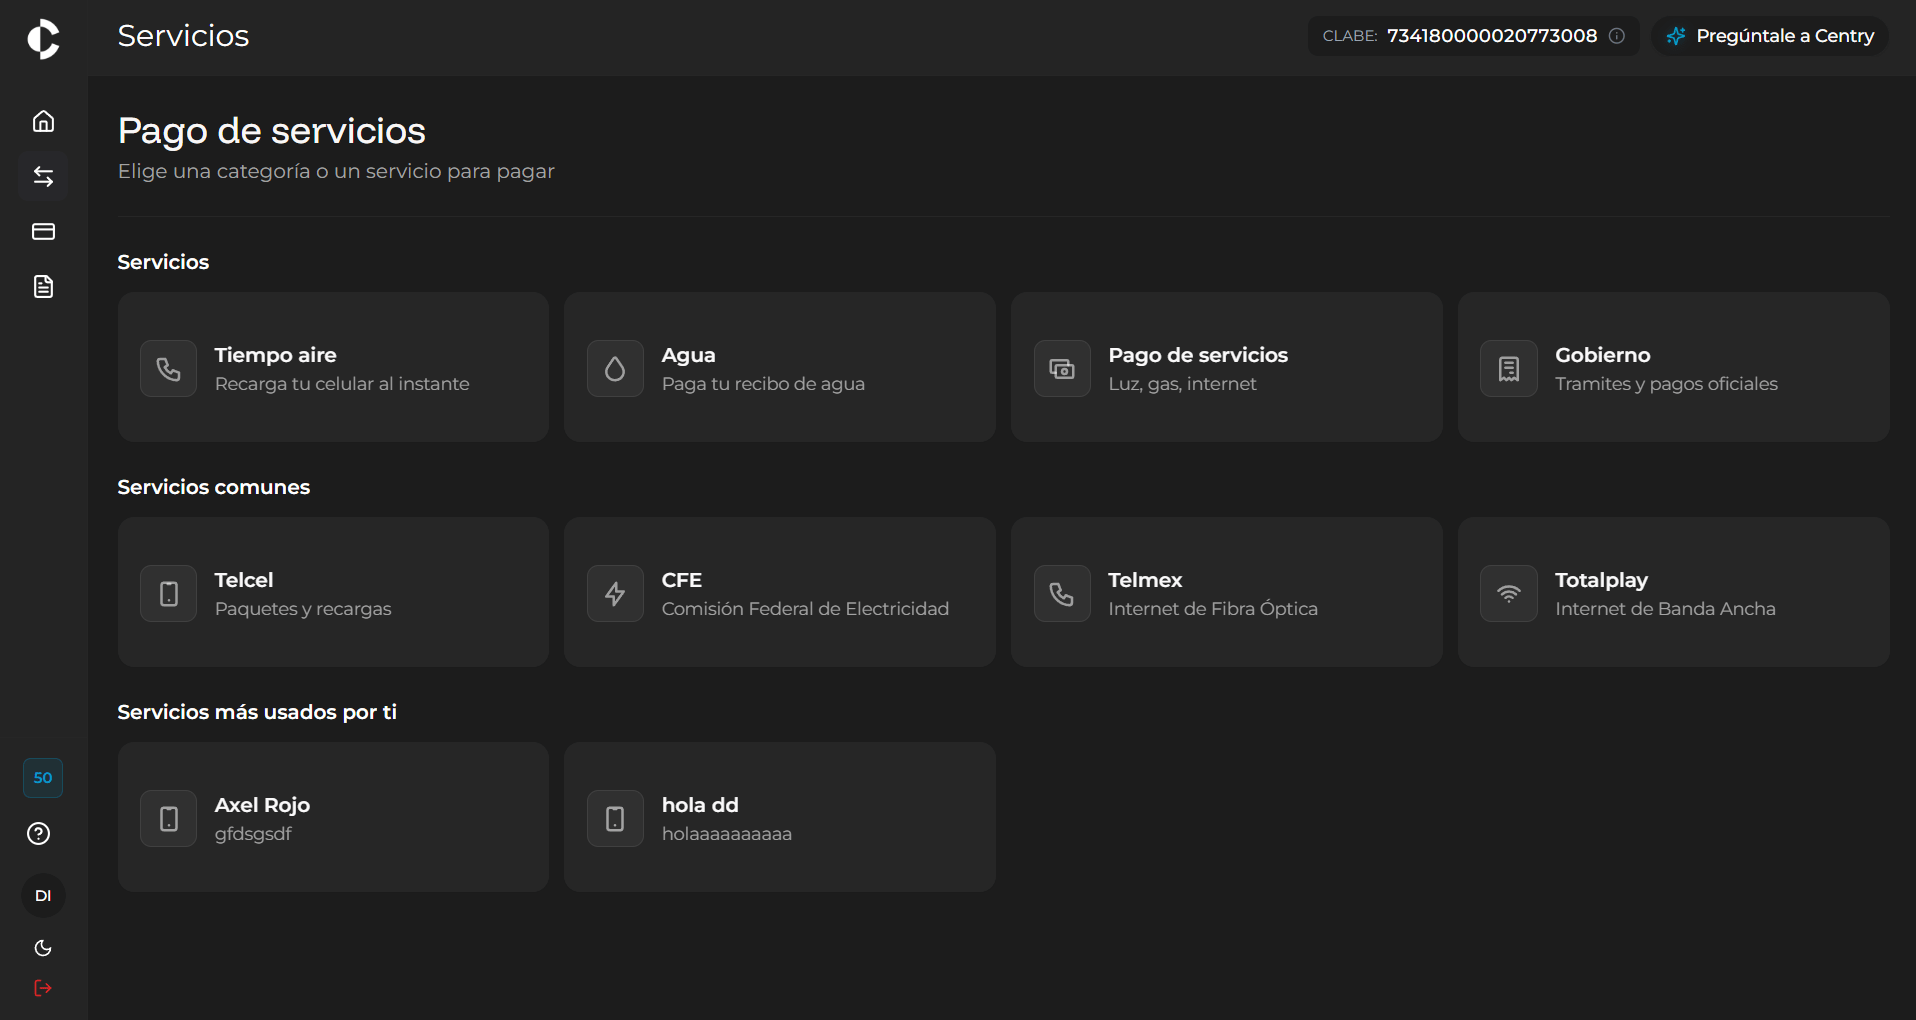
Category and Provider Selection
At this stage, you must select the category of service you wish to pay for or top up. For mobile telephony:- Select the “Airtime” option from the service catalog (or choose a direct service from the common options).
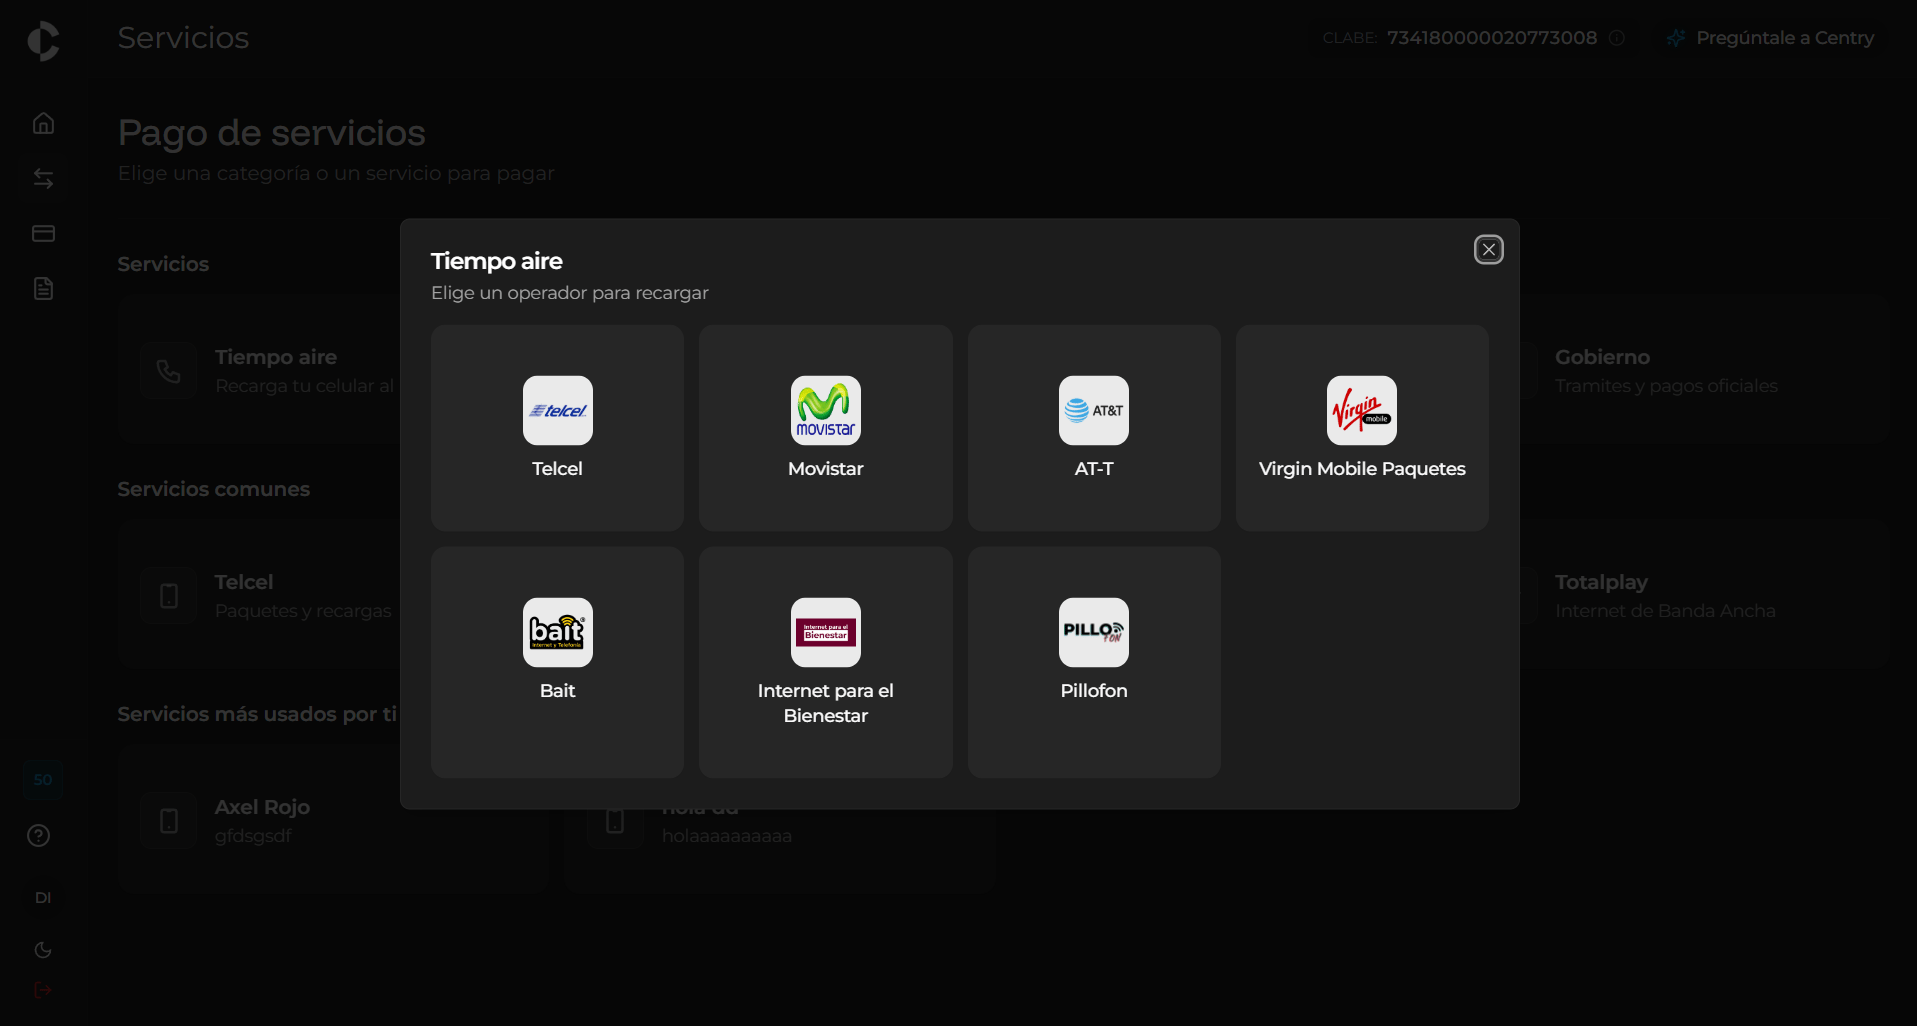
- The system will display a pop-up window (modal) with the different available providers (Telcel, Movistar, AT-T, Virgin Mobile Packages, Bait, Internet para el Bienestar, Pillofon, among others).
- Select the desired telephone company (for this example, AT-T).
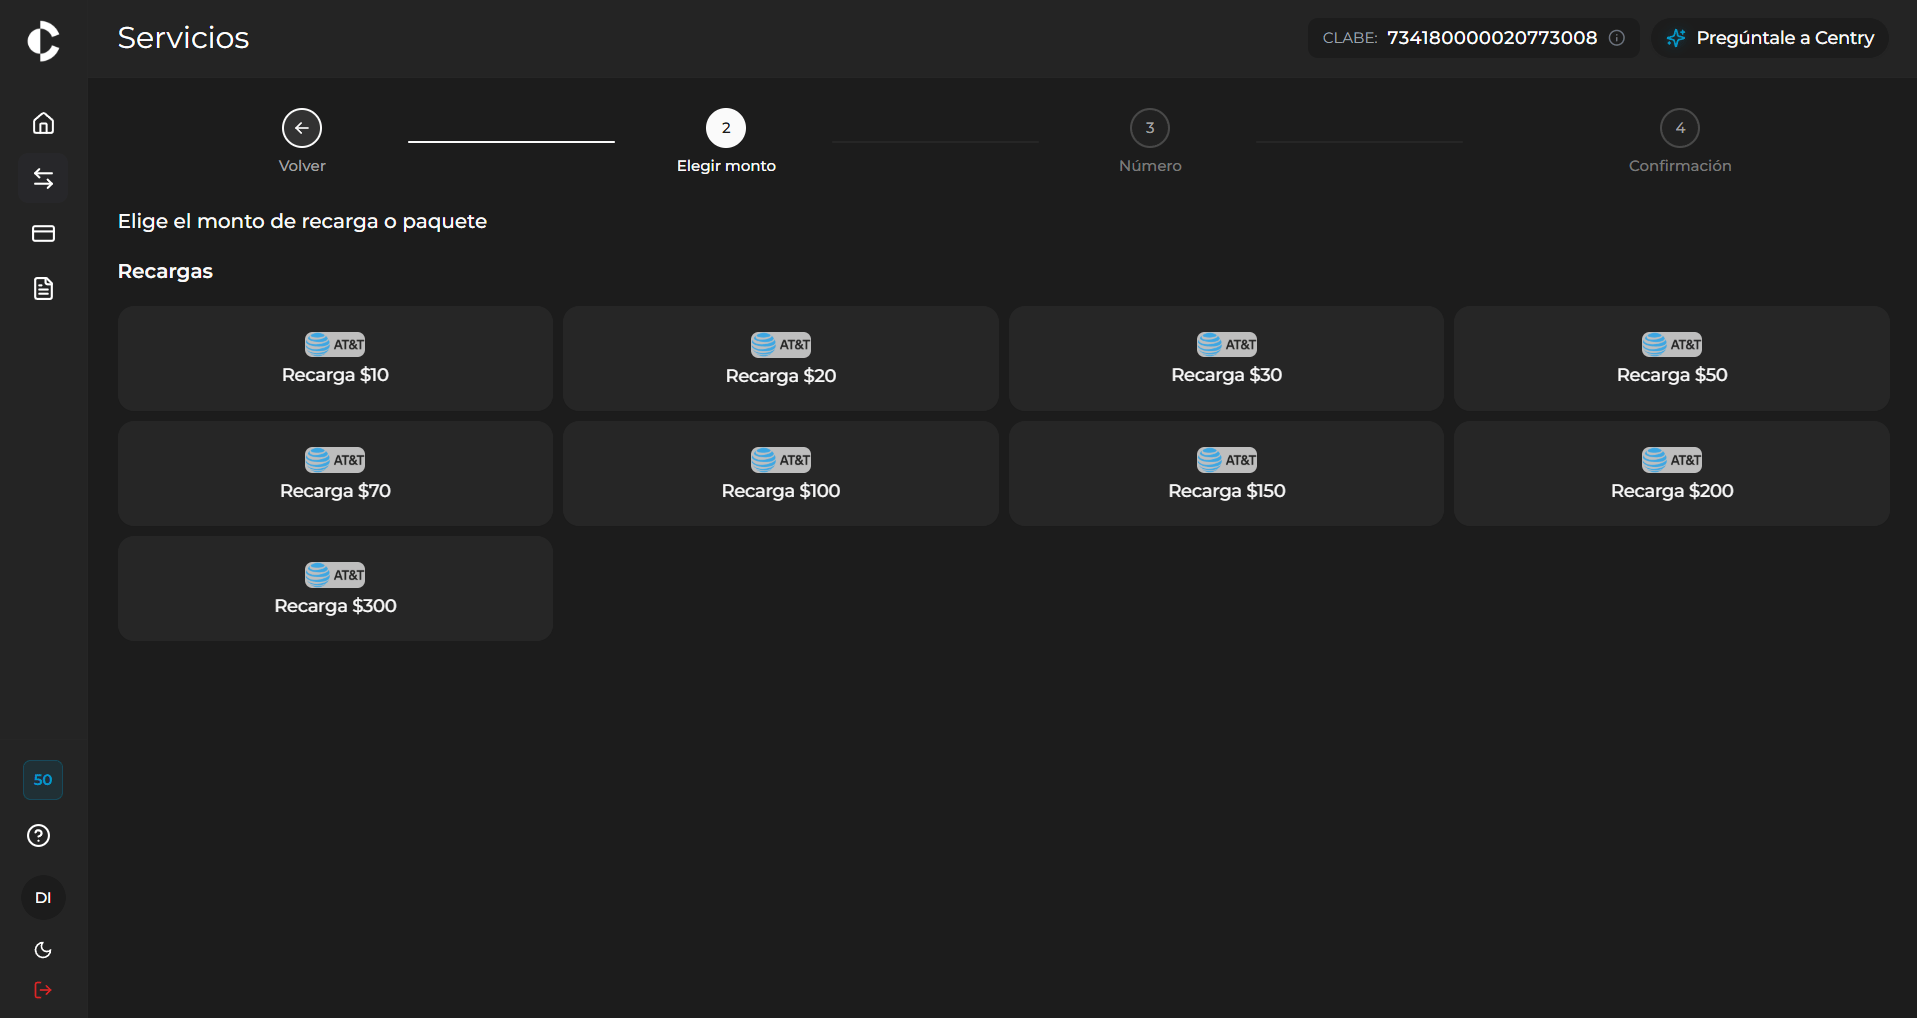
Top-Up Amount Selection
In the first step of the top-up flow (“Choose amount”), the system presents the available package or balance options for the selected provider. On this screen, you must:- View the list of offered amounts (for example: Top-up 20, 50, 100, 200, $300).
- Select the box corresponding to the amount you wish to credit.
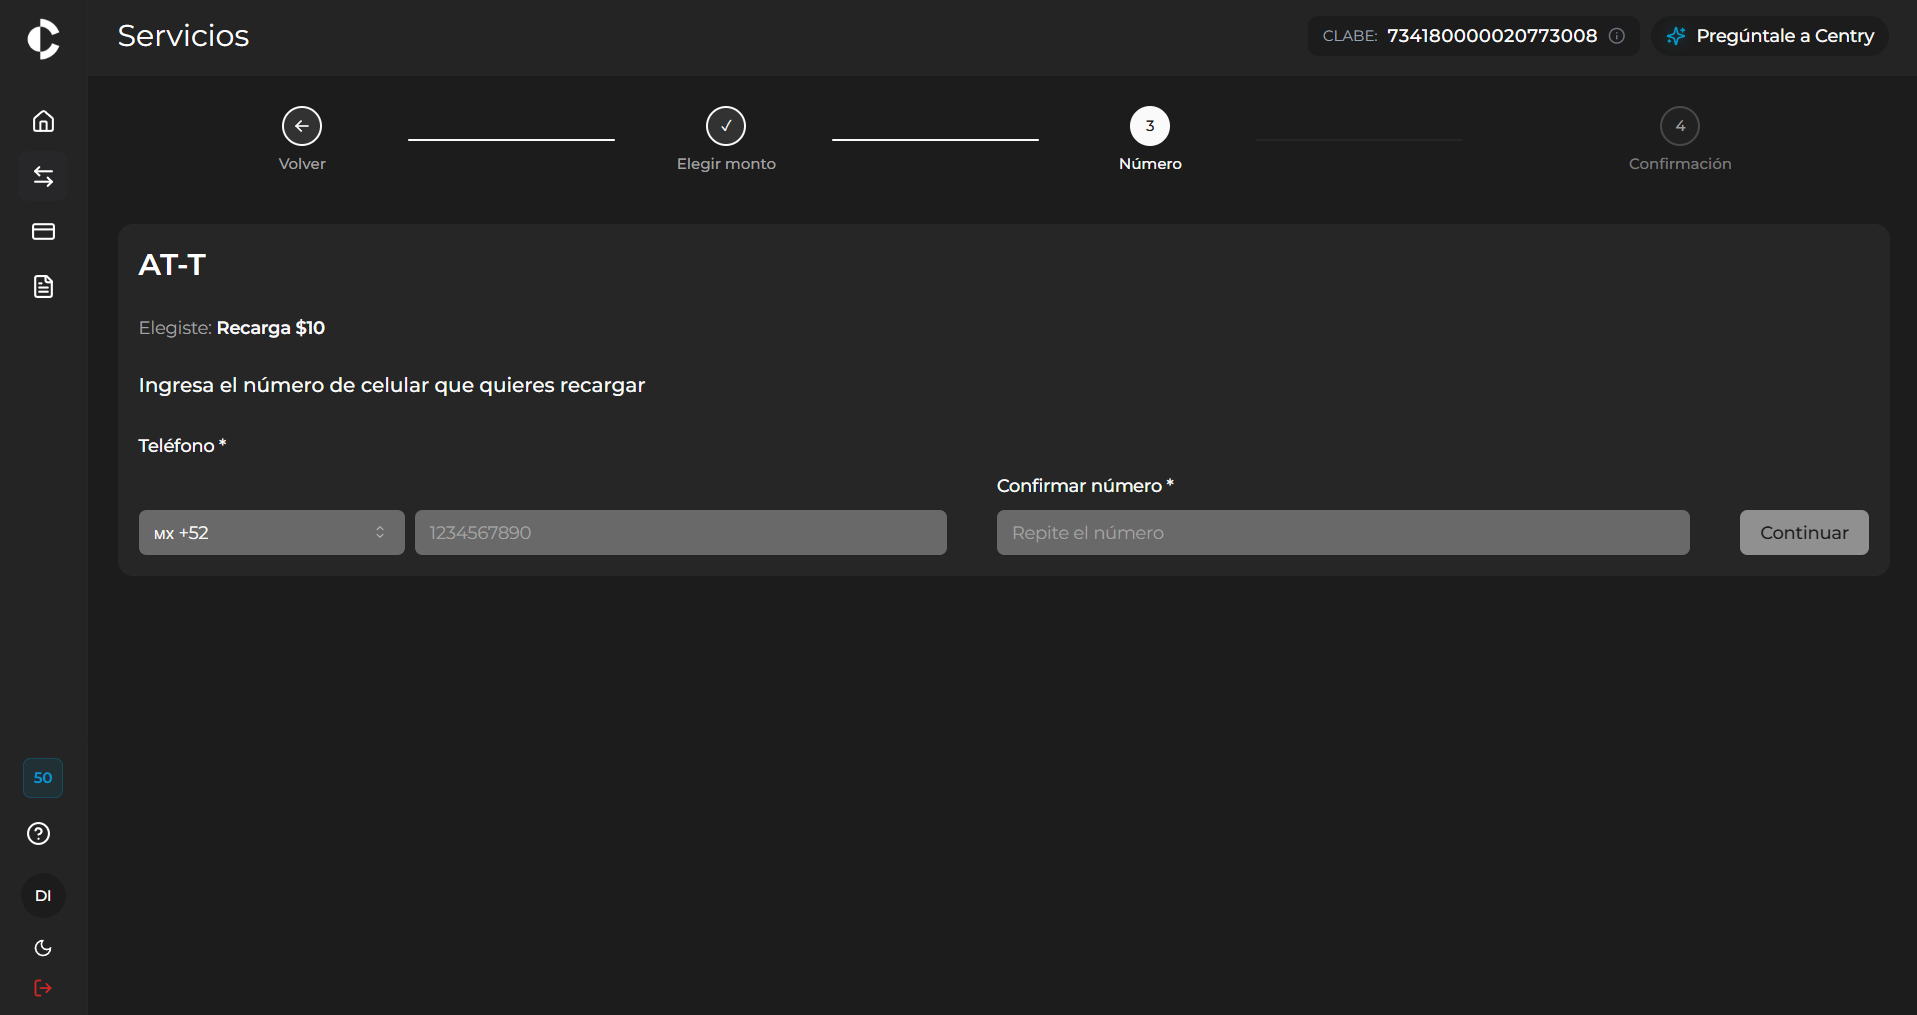
Phone Number Entry
In the “Number” step, the system will request the destination details for applying the top-up. In this section, you must enter the following information:- Country code: Select the corresponding code (by default
MX +52). - Phone: Enter the 10-digit mobile number to which the top-up will be applied.
- Confirm number: Re-enter the same phone number to validate that there are no input errors.
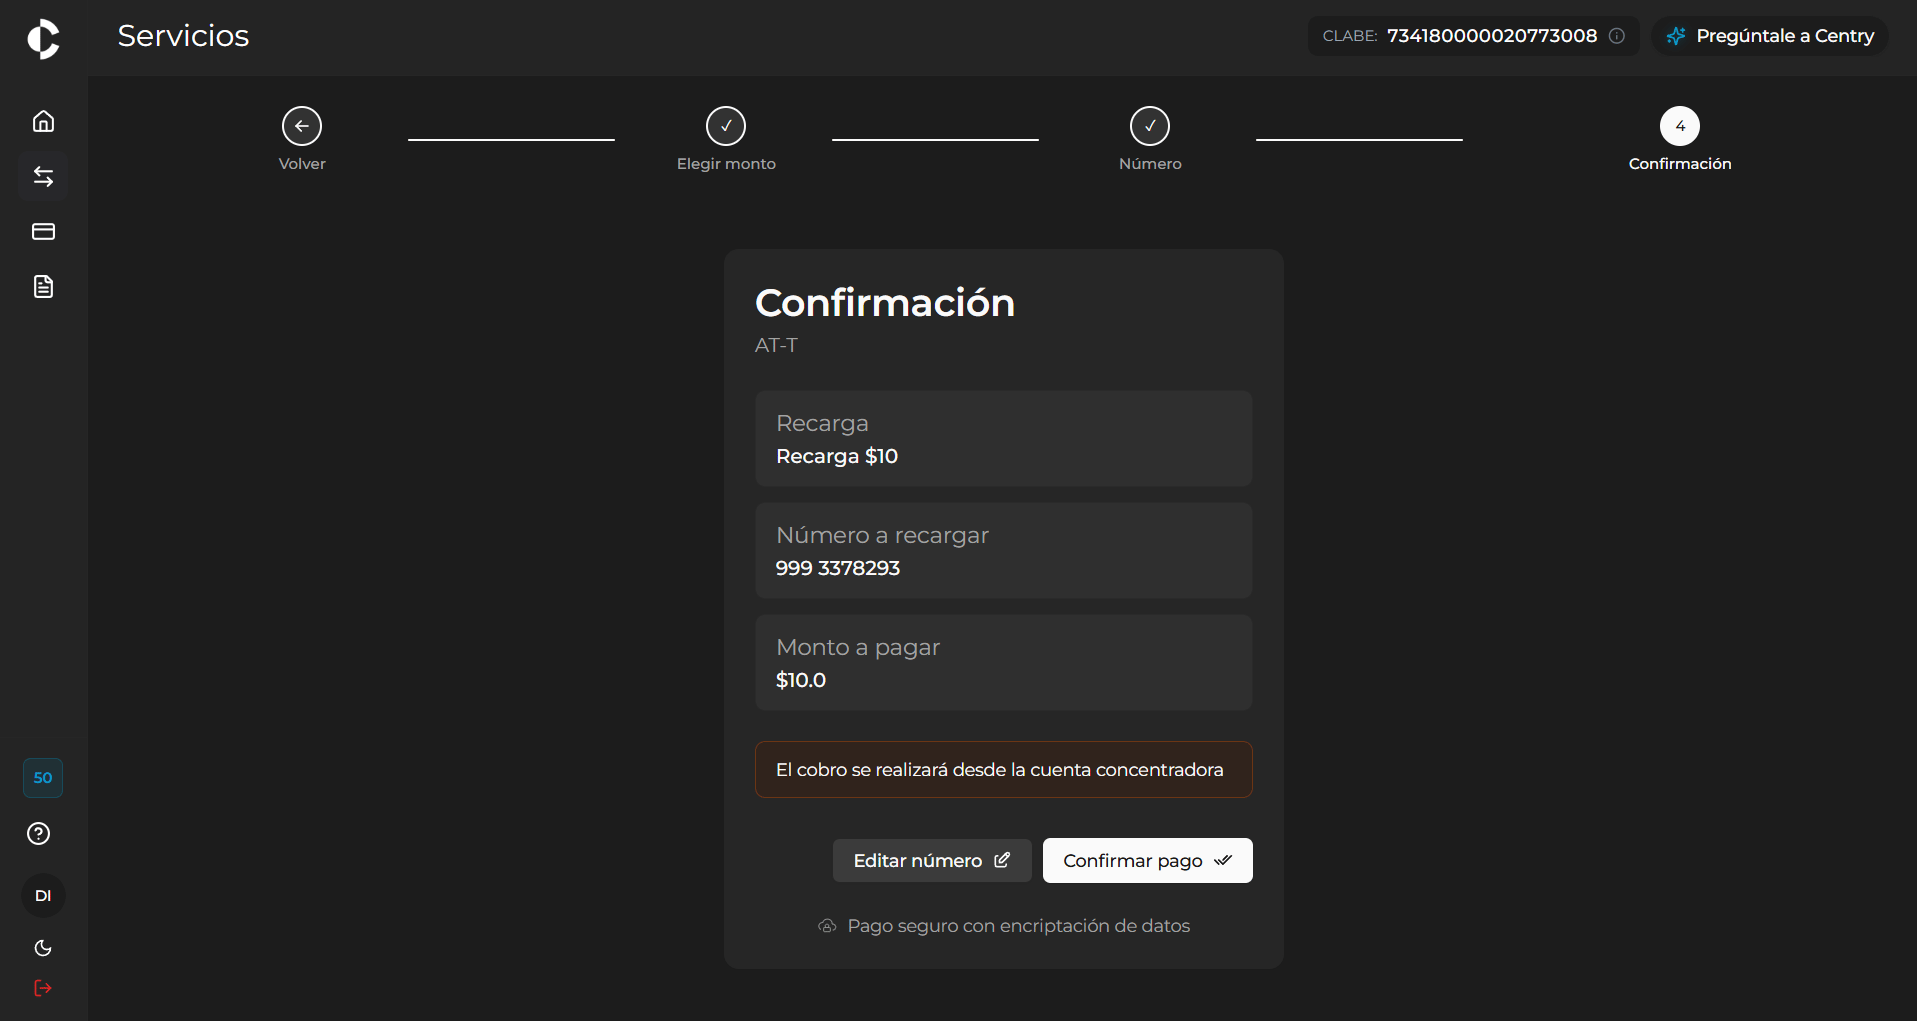
Transaction Confirmation
In the “Confirmation” step, the system presents a detailed summary of the operation before making the final charge. On this screen, you must validate the following information:- Provider: Company to which the top-up belongs (e.g., AT-T).
- Top-up: Amount of the selected package (e.g., Top-up $10).
- Number to top up: Beneficiary destination phone number.
- Amount to pay: Total to be debited from the account.
- Source of funds: Visual notification of the charge source (e.g., “The charge will be made from the main account”).
Receipt and Payment Completion
Once the top-up is processed, the system displays the “Payment successful!” screen, confirming that the funds have been successfully credited. This digital receipt details:- Operation status (Your payment was successfully applied).
- Total amount paid and provider.
- Authorization number: Unique folio assigned to the transaction.
- Reference / Phone: Beneficiary mobile phone number.
- Date: Exact date on which the operation took place.
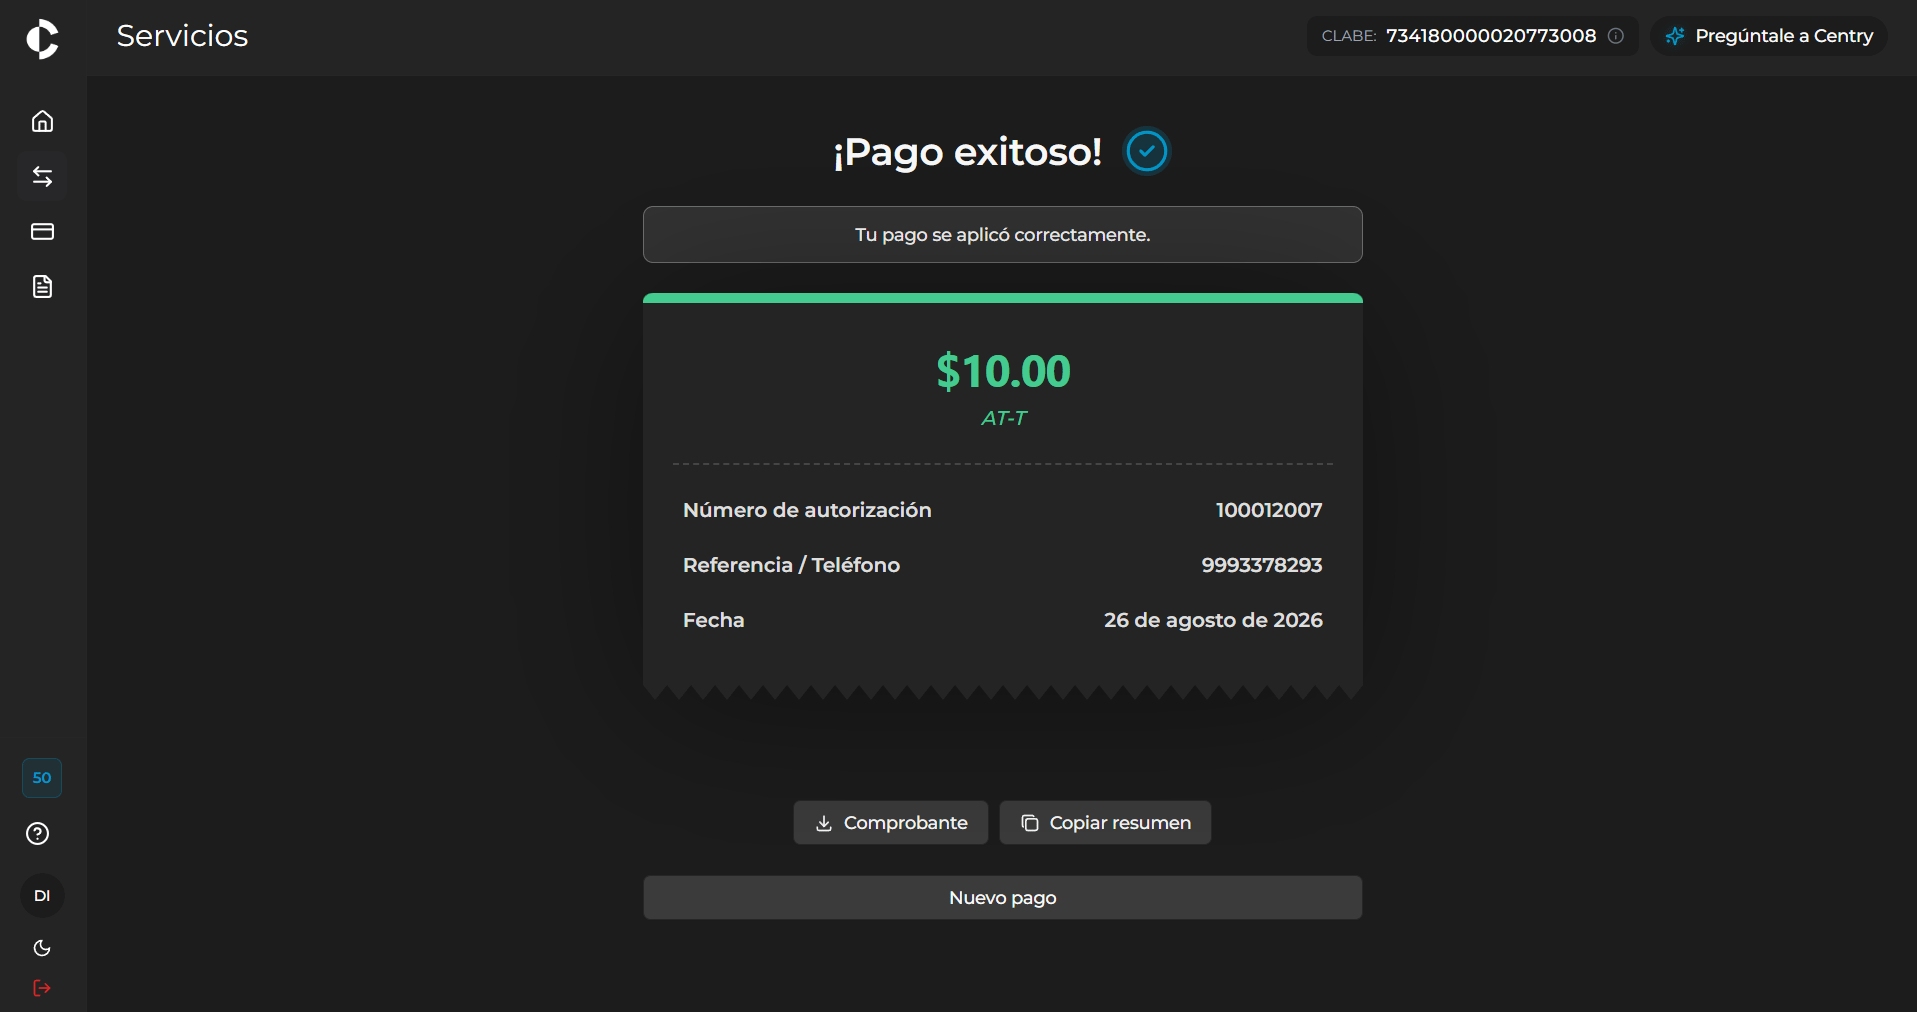
- Download Receipt: Allows you to download a digital PDF file with the operation summary.
- Copy summary: Copies key transaction information to the clipboard for quick sharing.
- New payment: Returns you to the main services screen to perform another operation.