Tax Status
The system asks the user to upload the company’s tax status certificate. Once the document is uploaded, the system evaluates whether it meets the established requirements. If the document is valid, the “Continue” button is enabled; otherwise, the user is asked to upload a file again that meets the conditions.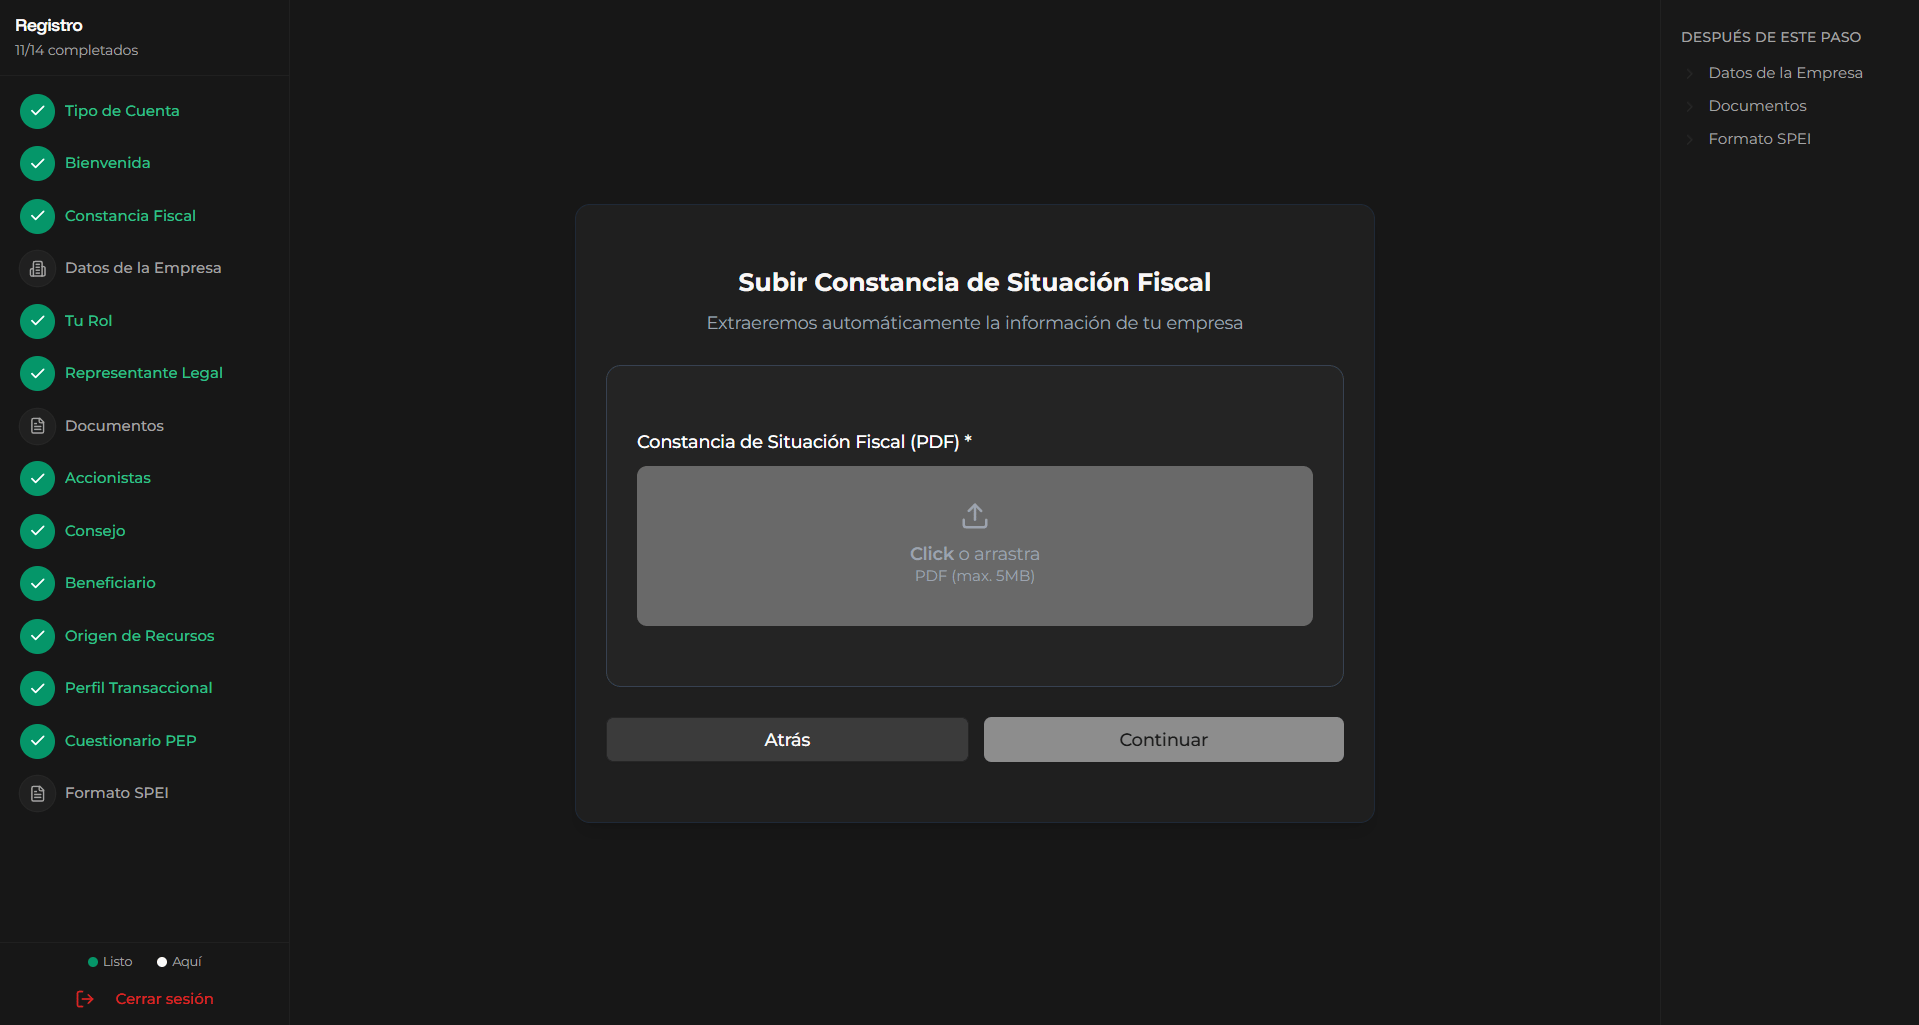
Company Information
The user accesses the “Validate company information” screen, where the system displays a form with data previously extracted from the uploaded document. The user reviews and completes the required fields, such as company name, RFC, legal name, incorporation date, address, category, monthly income, and contact information. Once the information is verified, the user selects “Continue”. The system validates that all fields are complete and correctly formatted. If the information is valid, it is saved and the user is allowed to proceed; otherwise, errors are displayed for correction.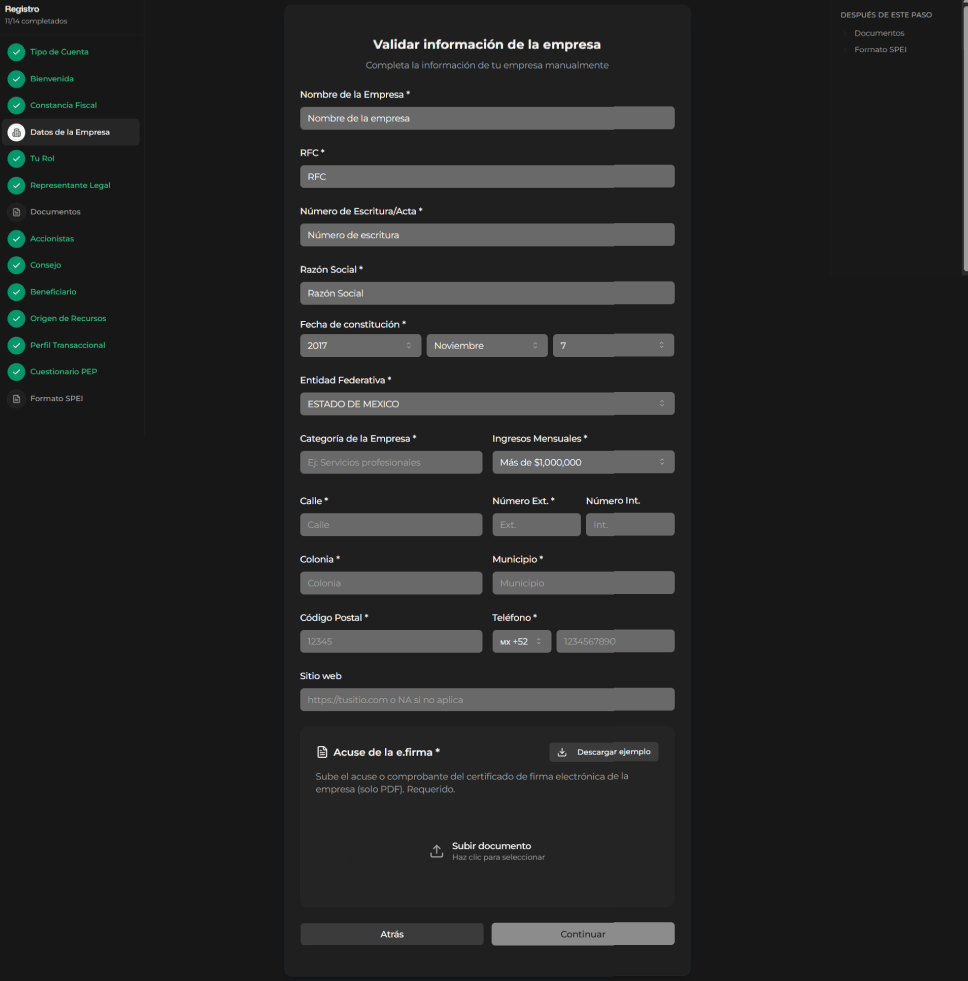
Rol
The system asks the user whether they are a legal representative or partner. For this flow, it continues as legal representative.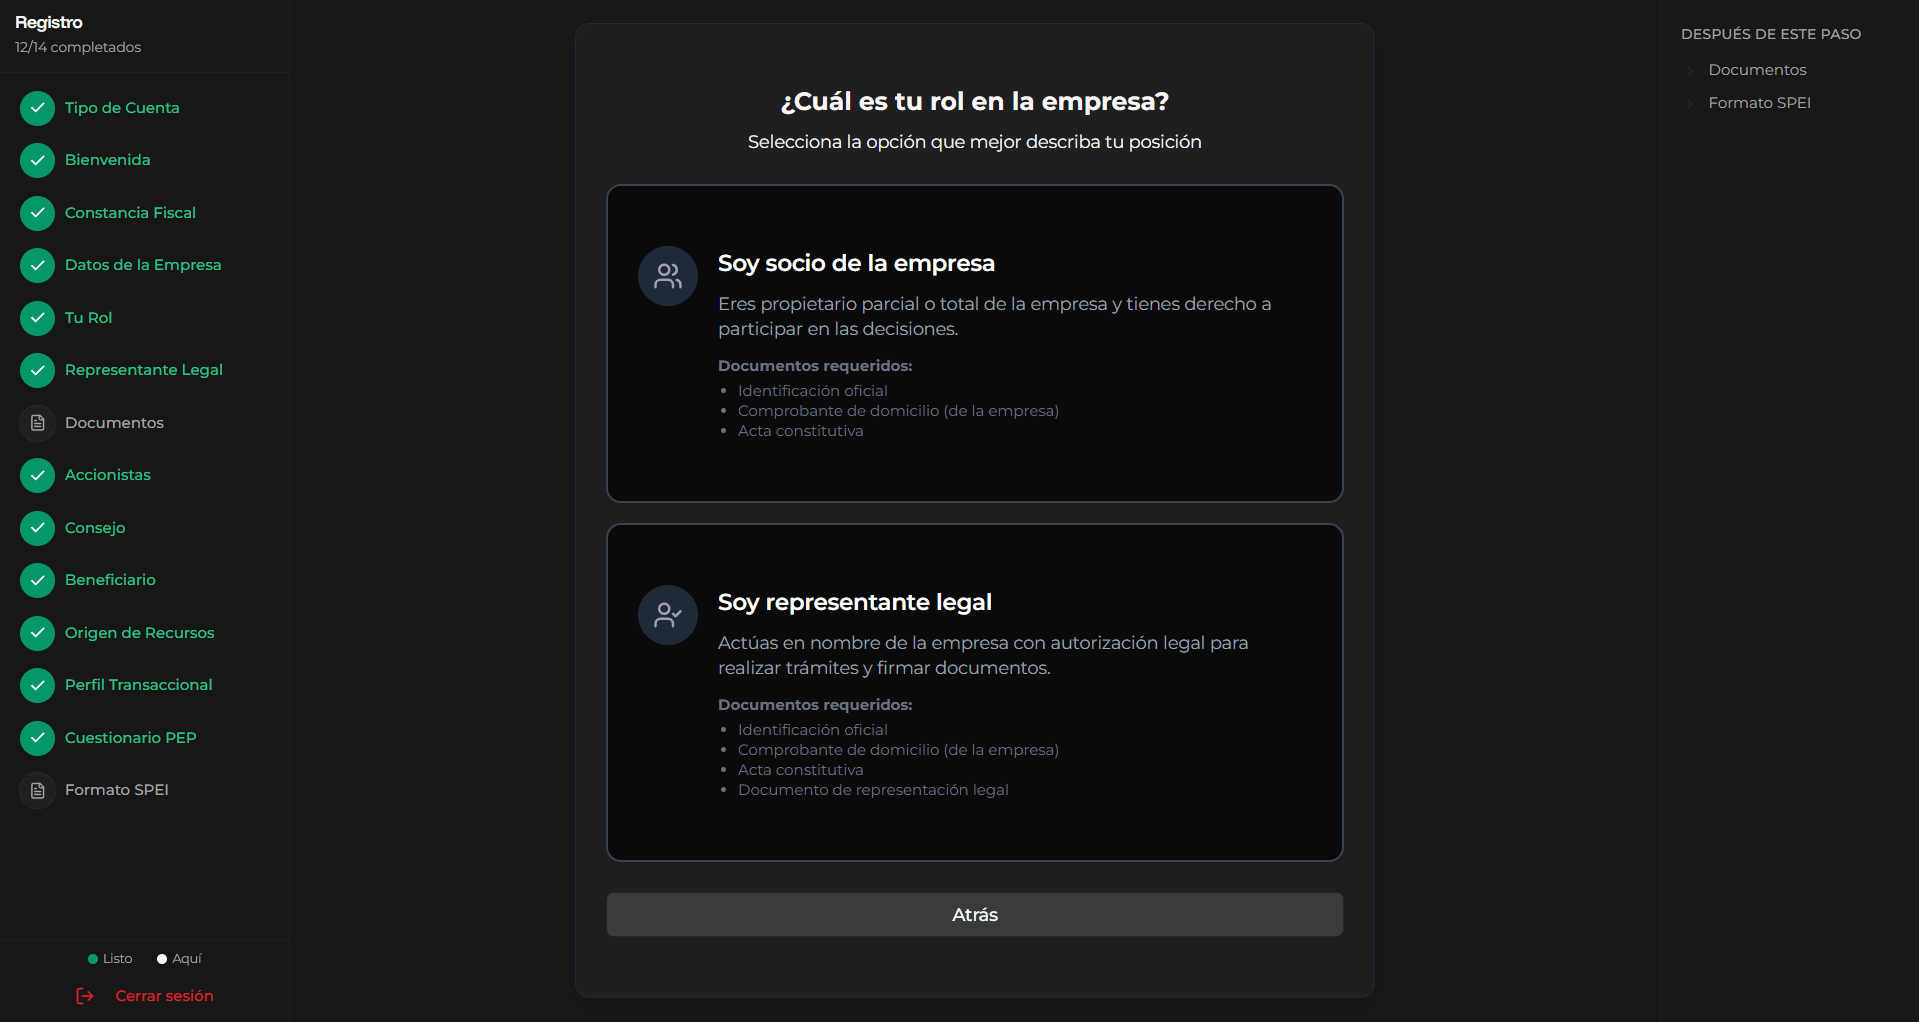
Legal Representative Information
The user accesses the corresponding section, where they must upload an official identification (INE, passport, or professional license). The system processes the image to automatically extract data. The user reviews and completes the personal and document information, ensuring that all required fields are correct. Subsequently, they select “Continue”. The system validates that the data is complete, that the formats are correct, and that the image is readable. If everything is valid, the information is saved and the process continues; otherwise, corrections are requested. The user can return to the previous step without losing the information.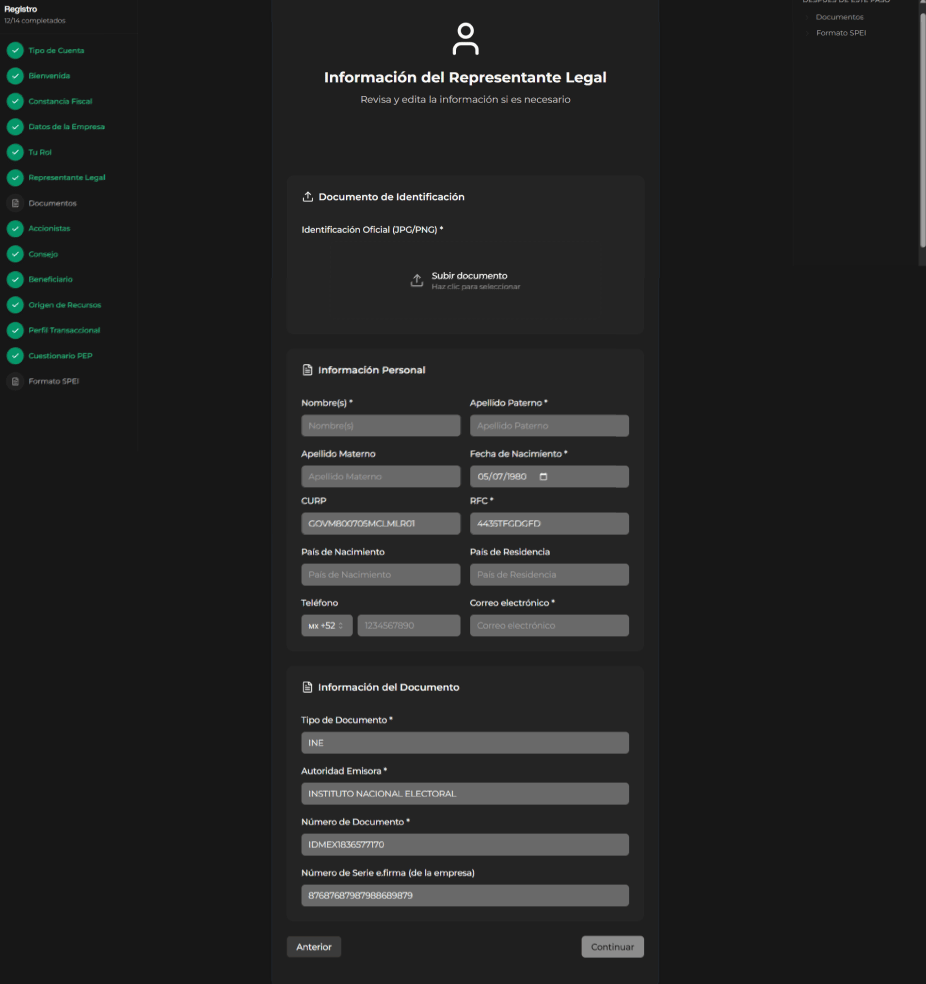
Additional Documents
In this section, the system requests the upload of mandatory documents to complete the registration, such as official identification, proof of address, articles of incorporation, power of attorney, and legal representation document. The user uploads the corresponding files and the system validates that all are present, in permitted formats, and within the established size. If the documents are valid, the “Complete registration” option is enabled; otherwise, corrections are requested. Upon completing this step, the system processes the information and displays a successful registration confirmation.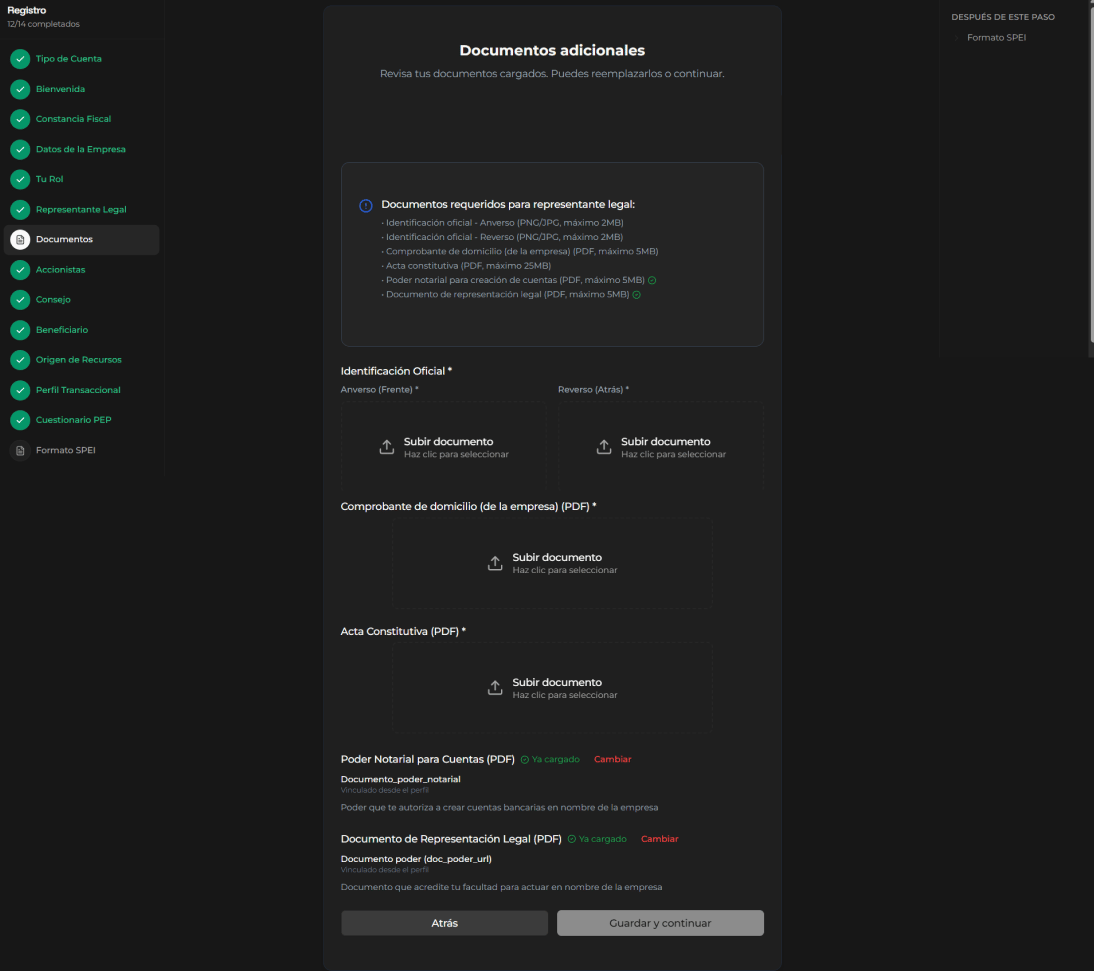
Shareholders of the Company
The user accesses the section where they must register the shareholders. The system indicates that at least two shareholders are required and that the total participation must add up to 100%. The user enters the information of each shareholder, uploads their official identification, and adds them to the list. The system automatically updates the total percentage and validates that the required conditions are met. When the criteria are met, the “Save and continue” button is enabled.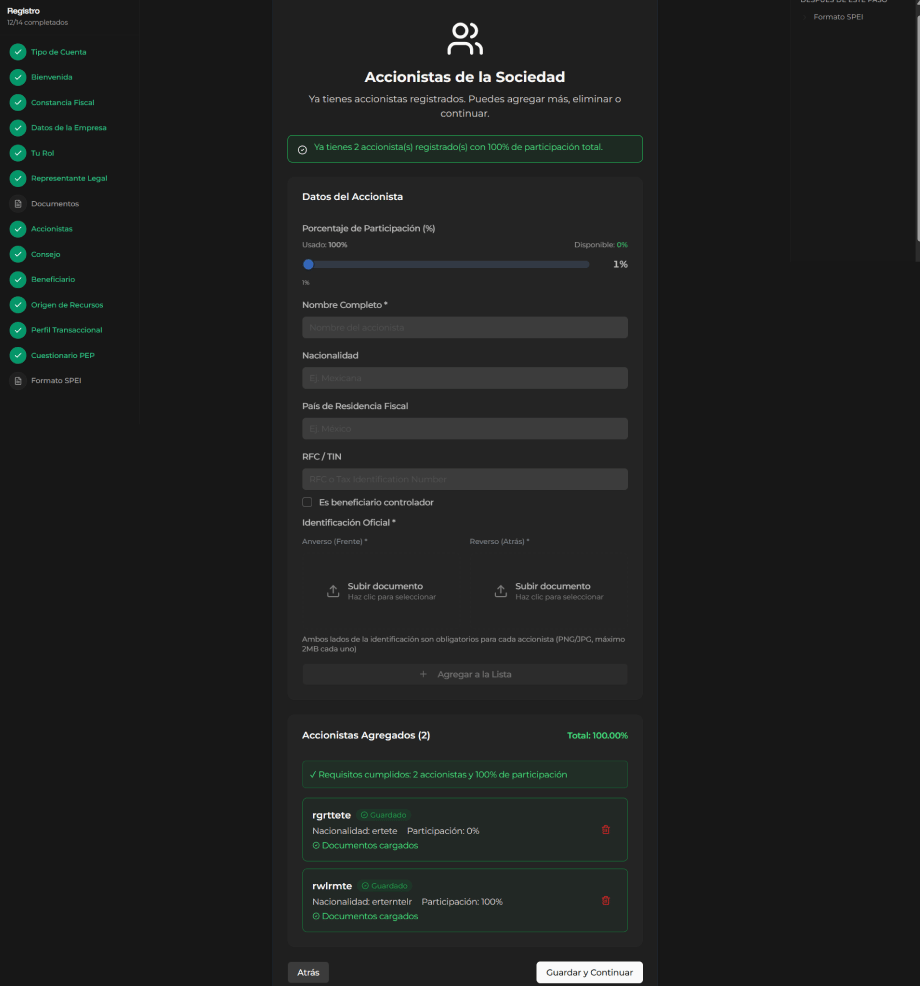
Board of Directors
The user registers the members of the board of directors by entering their basic information. They can add multiple members, remove them if necessary, and continue once the registration is completed.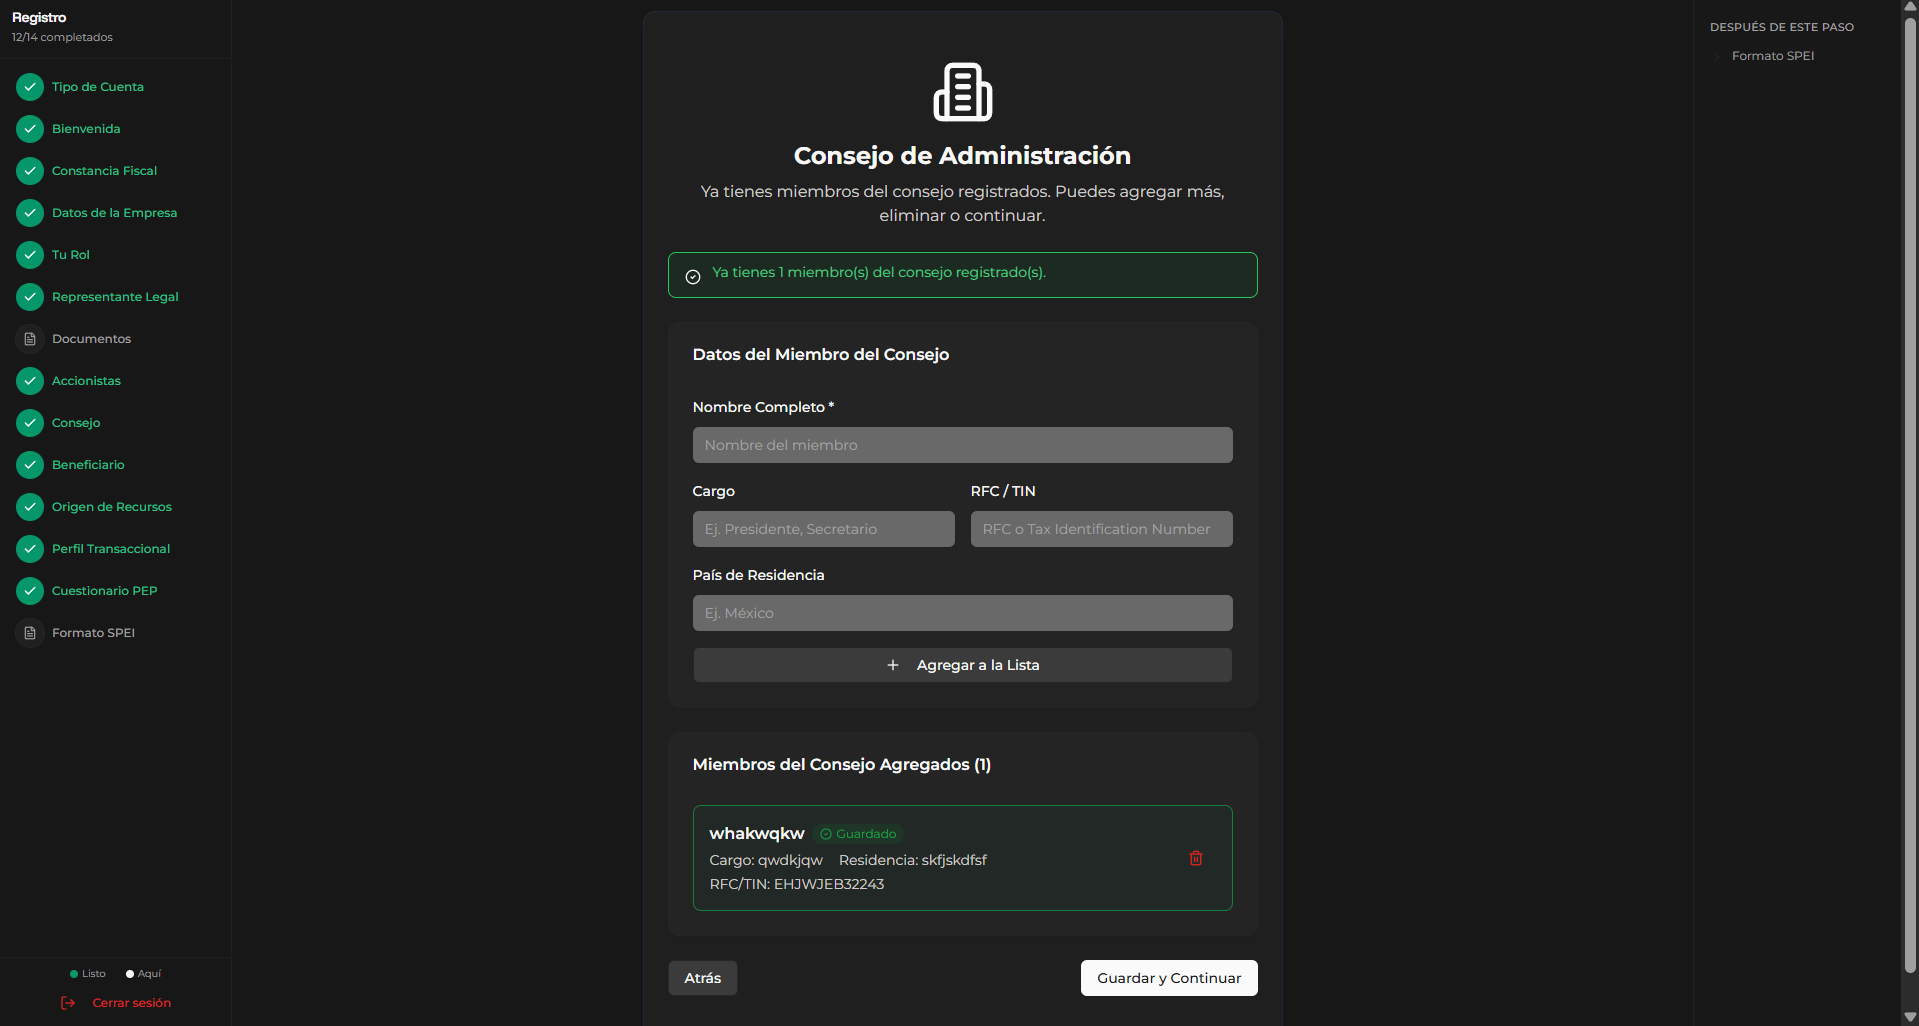
Controlling Beneficiary
The user selects the controlling beneficiary from the registered shareholders. The system automatically loads the information, allowing review and editing. The user completes the personal data, uploads the official identification, and saves the information to continue.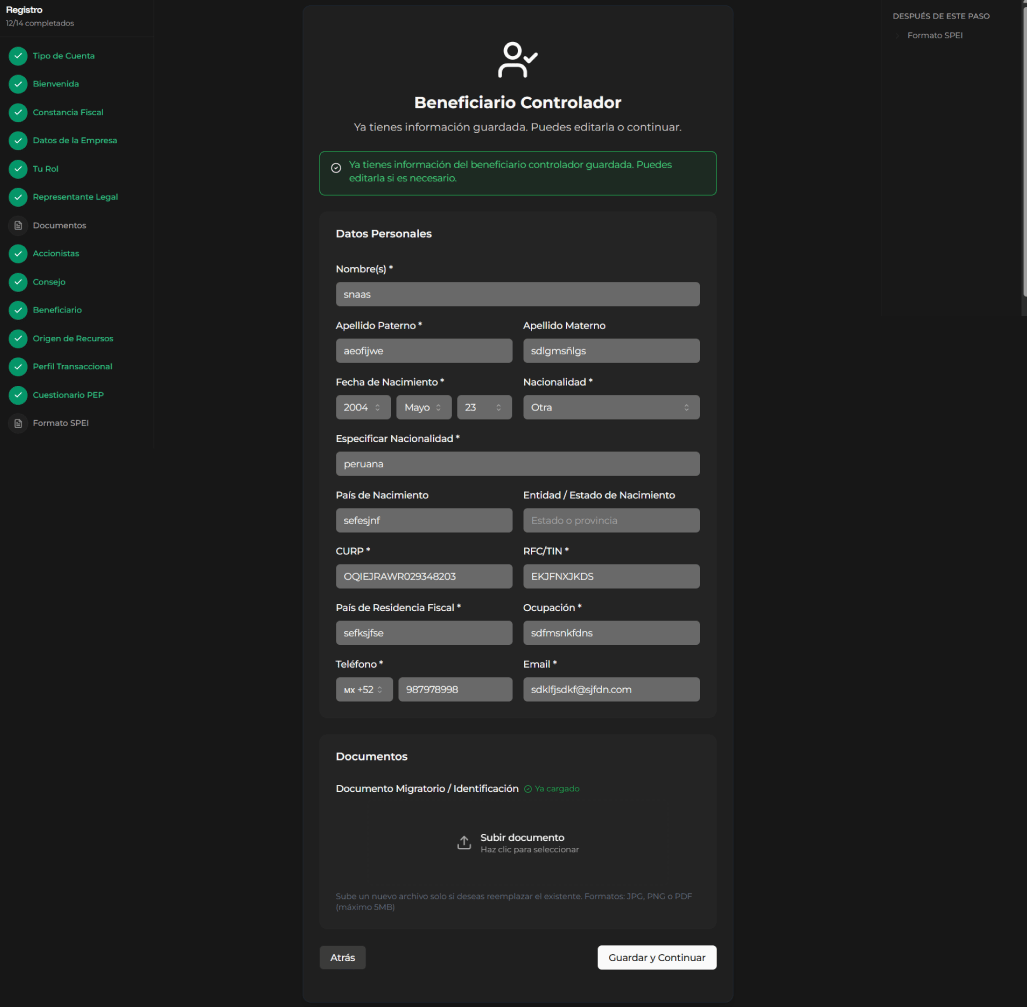
Source and Destination of Funds
In this section, the user provides financial information, including the source of income, country of origin of the funds, destination of the funds, and banking information. The system validates that all information is correct before allowing the user to proceed to the next step.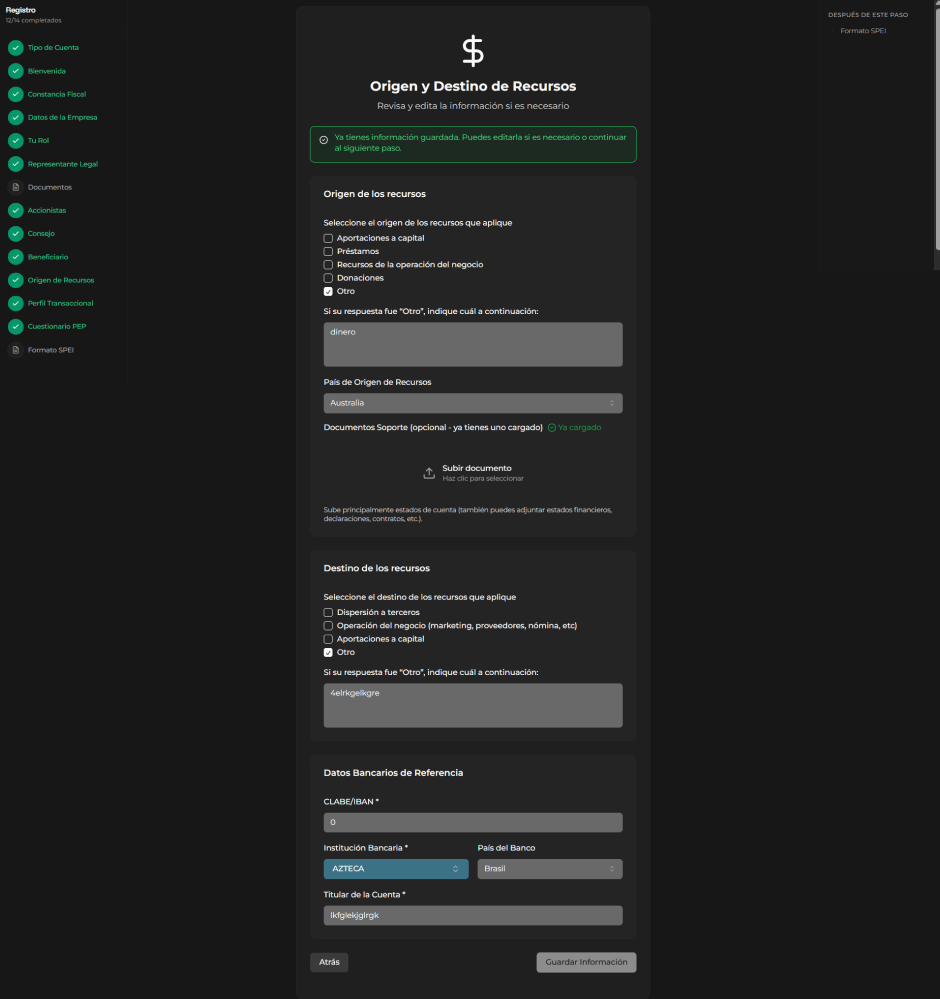
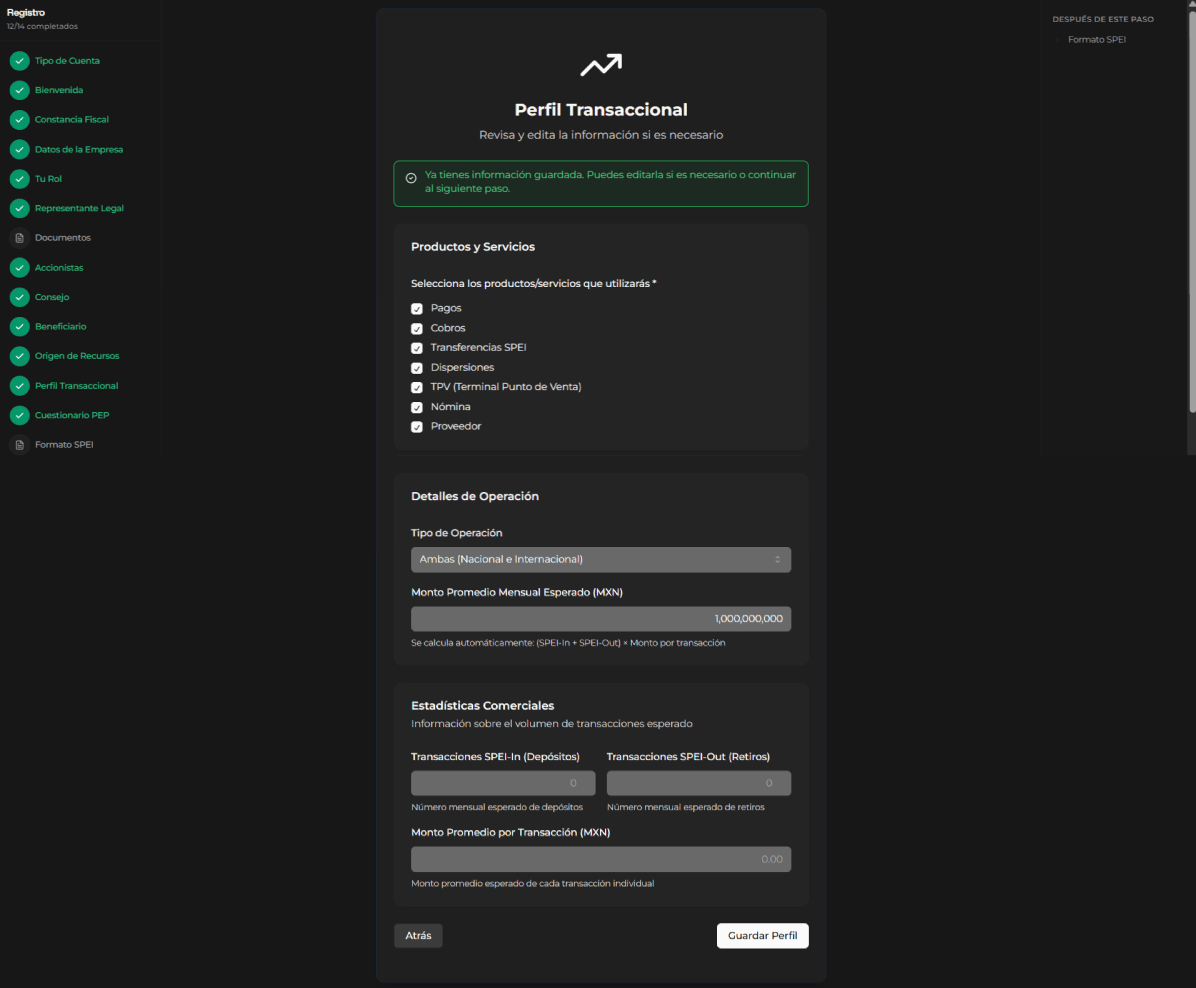
Transactional Profile
The user selects the products and services they will use, the type of operations (national, international, or both), and the average monthly transaction amount.Business statistics
The system displays the “Business Statistics” section, where information related to the expected volume of operations carried out through SPEI is requested. In this section, you must provide the following information:- Expected monthly number of SPEI-In deposits
- Expected monthly number of SPEI-Out withdrawals
- Expected average amount per transaction in MXN
PEP Questionnaire
The system presents a questionnaire to identify whether the user is a Politically Exposed Person (PEP) or has a relationship with one. Depending on the responses, the system may request additional information. If the user is not a PEP nor has a relationship, they can continue directly. Otherwise, they must complete the required data. The system validates that all information is complete before allowing the user to continue.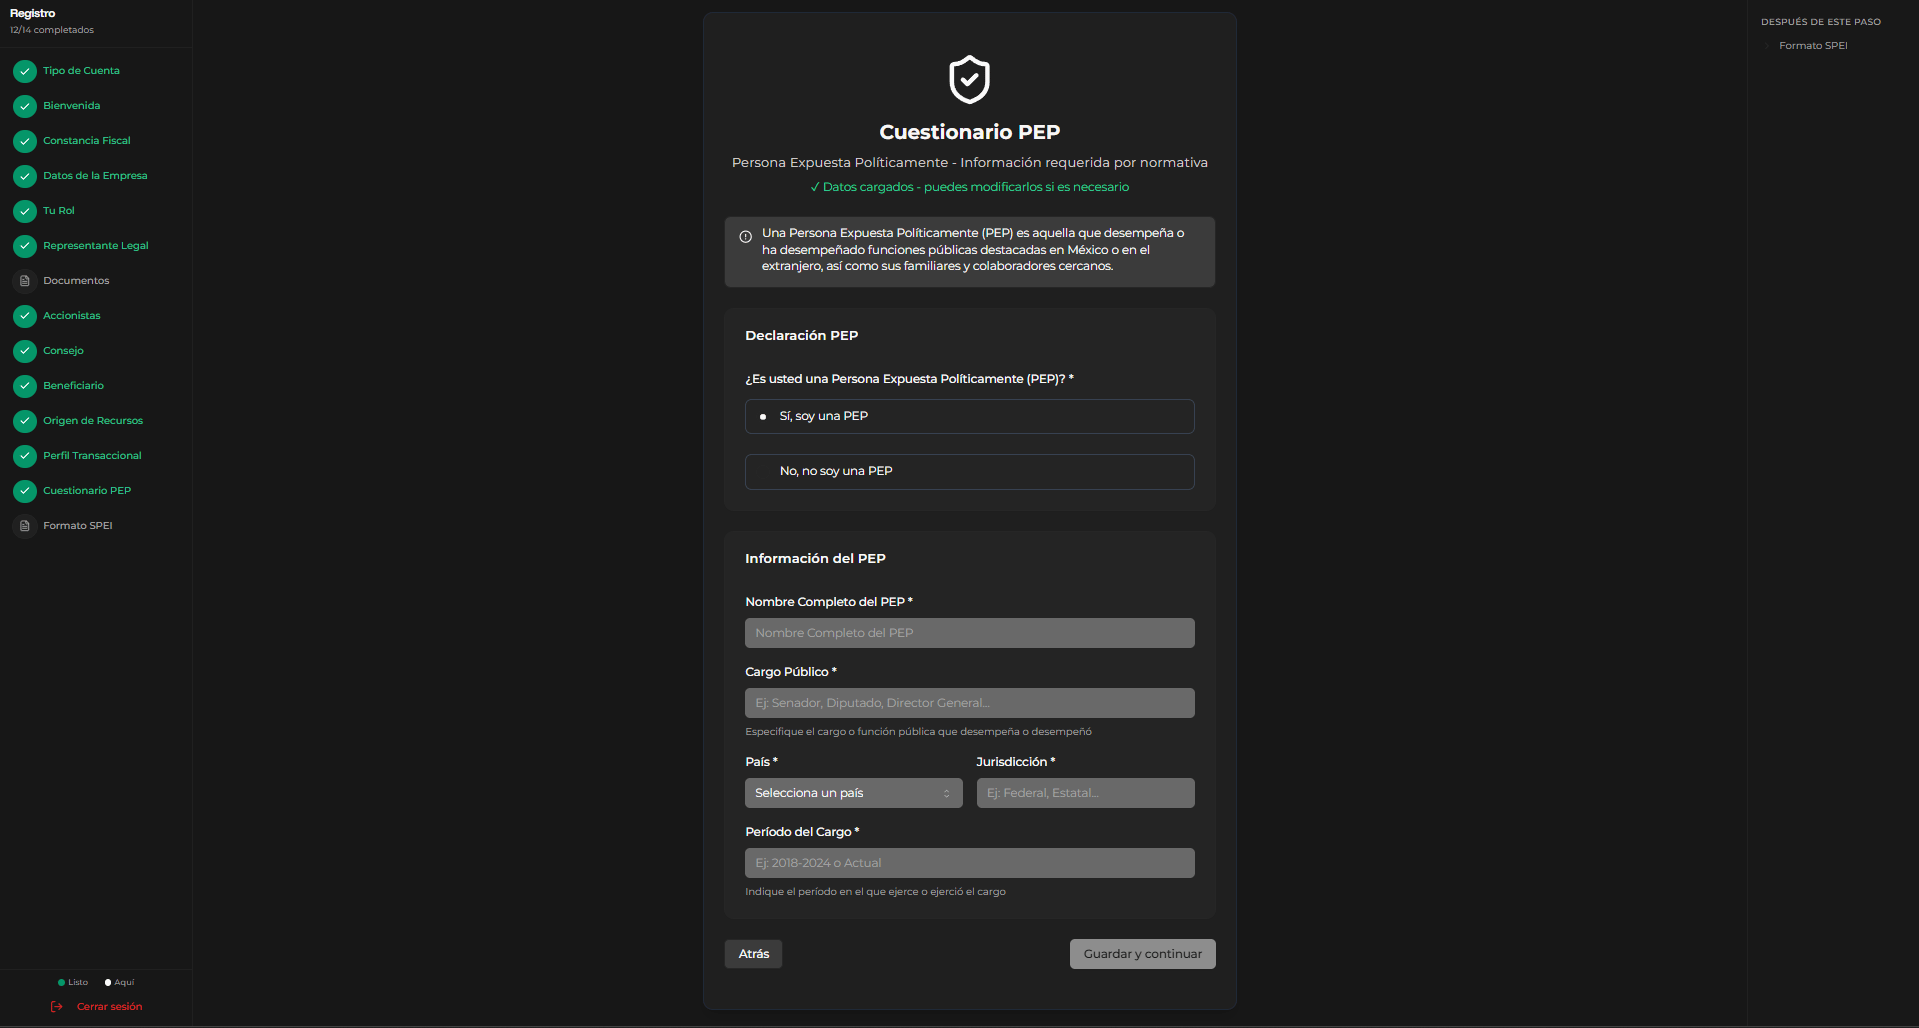
SPEI Form
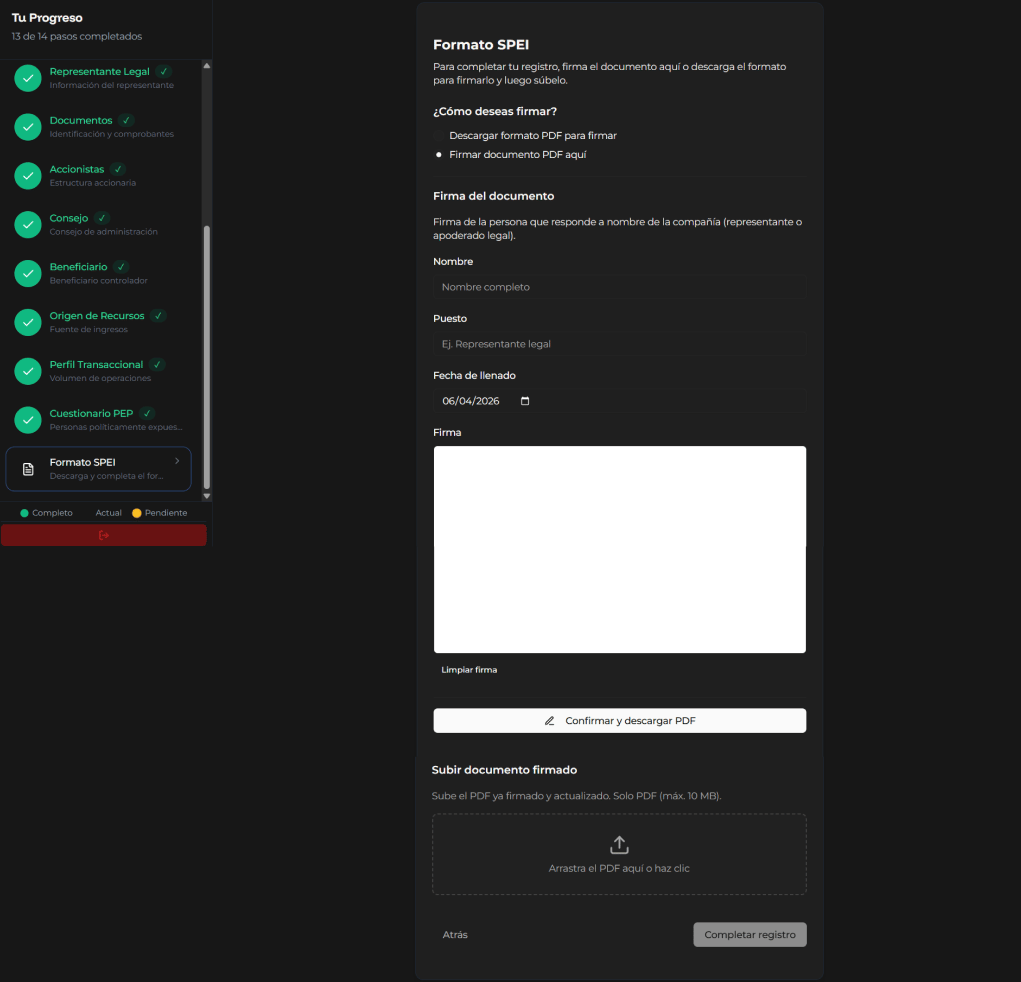
At this stage of the process, the system displays the “SPEI Form” screen, where the user is asked to complete and sign a document necessary to continue with their registration or validation within the system. The system presents two options to complete the document signing process:- Download PDF form to sign
- Sign PDF document here
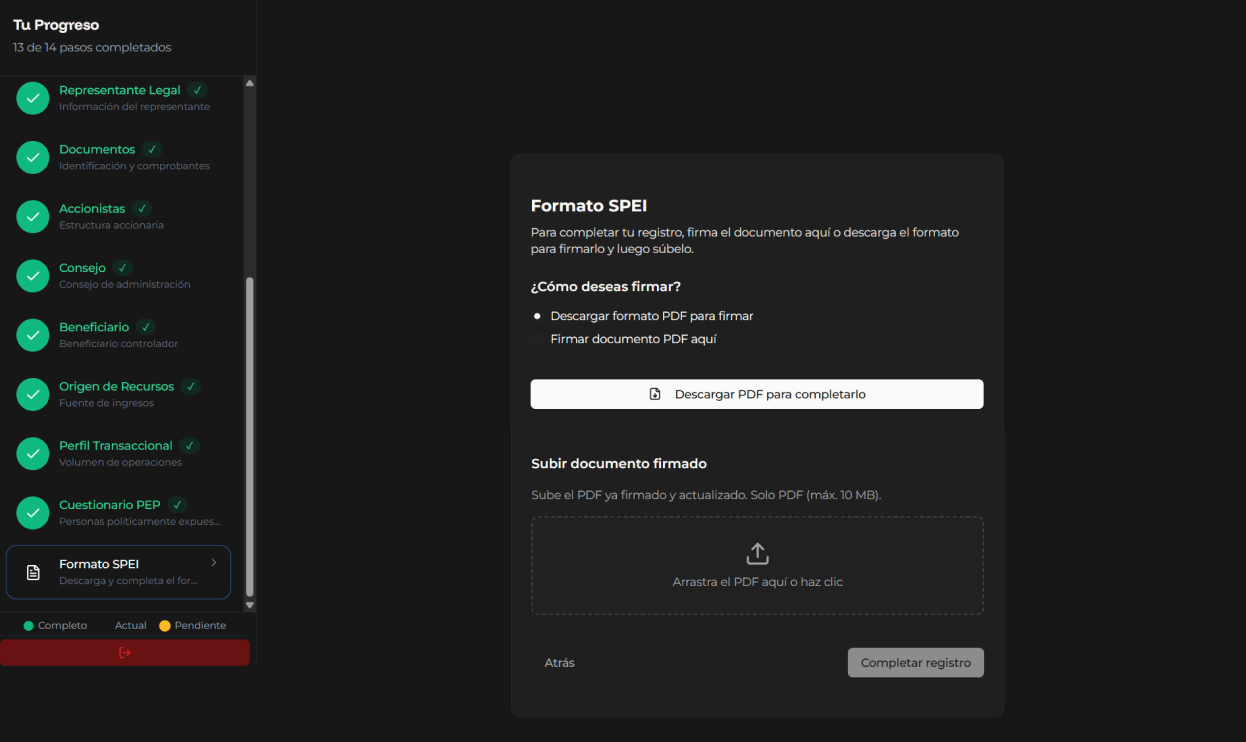
If you select the “Sign PDF document here” option, the system will display the “Document signature” form, where you will be asked to enter the necessary information to complete the digital signature process. On this screen, the system displays the following fields:
- Name
- Position
- Completion date
- Signature
Once the information has been completed and the signature has been registered, you must select the “Continue and download PDF” option. The system will automatically generate the signed document and make it available for download.